Adding an ice thickness inversion task
This example illustrates the concept of entity tasks by implementing a new task for the ice thickness inversion. We are therefore using the OGGM preprocessing workflow only, and add our own tool on top of it.
The new task is called distributed_vas_thickness and is very simple:
with a baseline volume obtained from volume area scaling, we distribute the
local ice thickness so that the ice gets thicker as a function of the
distance to the boundaries, and so that the total volume is conserved.
The implementation can be found in oggmcontrib/tasks.py. This module contains
two functions: a helper function called distance_from_border and the
actual task distributed_vas_thickness.
Have a short look at the code in oggmcontrib/tasks.py before going on.
Entity tasks in OGGM allow only one single argument: a GlacierDirectory instance, which gives access to all the input files in the working directory. Tasks can have as many keyword arguments as you wish, though. They can return data (useful for testing), but in order to fit in the stop/restart workflow of OGGM they should write their output in the working directory though. Here we use an existing NetCDF file and add the output of our function to it.
The last element that makes of a function a real “entity task” for OGGM is the
addition of the @entity_task decorator on top of it. If you are not used
to python decorators, don’t worry: just keep in mind that these decorators are
here for three major purposes:
- logging
- error handling (if your task raises an error on certain glaciers, OGGM might choose to ignore it if the user wants it that way)
- multi-processing (by complying to a certain syntax, tasks cn be sent to OGGM’s task manager)
Apply our new task to a single glacier
Let’s use our usual test glacier for this:
import geopandas as gpd
import oggm
from oggm import cfg, tasks
from oggm.utils import get_demo_file

# Set up the input data for this example
cfg.initialize()
cfg.PATHS['working_dir'] = oggm.utils.get_temp_dir('oggmcontrib_inv')
cfg.PATHS['dem_file'] = get_demo_file('srtm_oetztal.tif')
cfg.set_intersects_db(get_demo_file('rgi_intersect_oetztal.shp'))

# Glacier directory for Hintereisferner in Austria
entity = gpd.read_file(get_demo_file('Hintereisferner_RGI5.shp')).iloc[0]
gdir = oggm.GlacierDirectory(entity)

# The usual OGGM preprecessing
tasks.define_glacier_region(gdir, entity=entity)
tasks.glacier_masks(gdir)
This was all OGGM stuff. Now let’s use our new task on this preprocessed data:
from oggmcontrib.tasks import distributed_vas_thickness
out_thick = distributed_vas_thickness(gdir)
And plot it:
In [1]: plt.figure(figsize=(7, 4));

In [2]: plt.imshow(out_thick);

In [3]: plt.colorbar(label='Thick [m]');
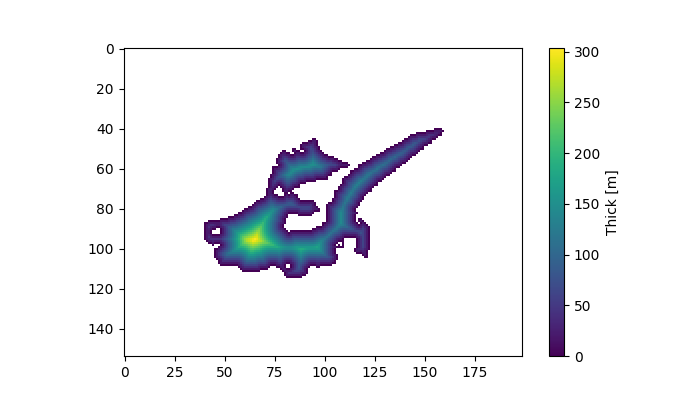
Note that in this task we took the ice divide into account. The ice thickness is very unrealistic of course, but so is our simple method.
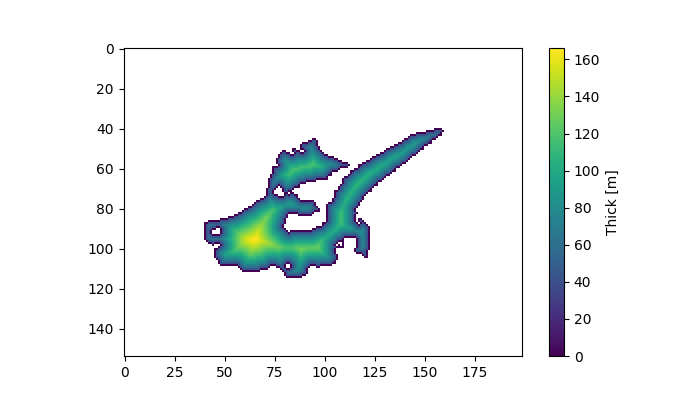
We can use the keyword arguments just like a regular function of course:
from oggmcontrib.tasks import distributed_vas_thickness
out_thick = distributed_vas_thickness(gdir, sqrt=True)
In [4]: plt.figure(figsize=(7, 4));

In [5]: plt.imshow(out_thick);

In [6]: plt.colorbar(label='Thick [m]');
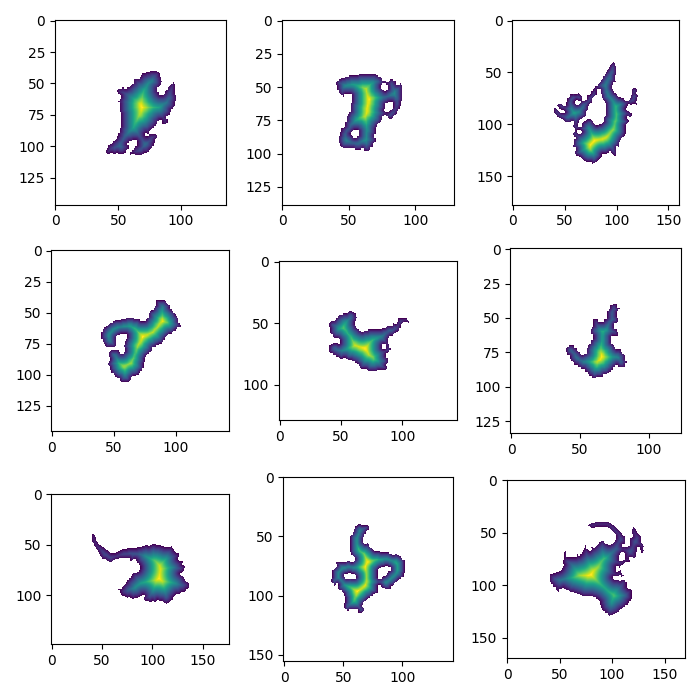
Apply our new task in parallel
Let’s go big, and apply our task to the selections of glaciers in the Öztal Alps:
# Read in the RGI file
rgi_file = get_demo_file('rgi_oetztal.shp')
rgidf = gpd.read_file(rgi_file)

# Use multiprocessing to apply the OGGM tasks and the new task to all glaciers
from oggm import workflow
cfg.PARAMS['use_multiprocessing'] = True
gdirs = workflow.init_glacier_regions(rgidf)
workflow.execute_entity_task(tasks.glacier_masks, gdirs)
# Yes, also your new task!
workflow.execute_entity_task(distributed_vas_thickness, gdirs)
Define a simple function to plot them:
import netCDF4

def plot_inversion(gdir, ax):
    """Plot the VAS inversion for this glacier."""

    # Read the data
    grids_file = gdir.get_filepath('gridded_data')
    with netCDF4.Dataset(grids_file) as nc:
        thick = nc.variables['vas_distributed_thickness'][:]

    ax.imshow(thick)
Let’s go:
In [7]: f, axs = plt.subplots(3, 3, figsize=(7, 7));

In [8]: for gdir, ax in zip(gdirs[:9], np.array(axs).flatten()):
   ...:    plot_inversion(gdir, ax)
   ...:

In [9]: plt.tight_layout();